
11 Whimsical Wedding Ideas That Do Not Feel Childish or Cliché
11 Whimsical Wedding Ideas That Do Not Feel Childish or Cliché
The moment I walked into a venue where the tables were dressed in identical white chargers and the ceremony backdrop was a generic string of lights.
I felt the wedding would blend into every other Instagram feed. I wanted something that whispered wonder without slipping into a children’s party.
In this list I’m sharing eleven grown‑up whimsical touches, from mismatched vintage brass candlesticks grouped in odd numbers to potted saplings marking the aisle, that keep the magic alive and the vibe sophisticated.
Whether you’re planning an intimate garden ceremony or a grand ballroom affair, these ideas give you concrete steps, budget‑friendly shortcuts, and safety reminders so the day feels enchanted, not chaotic.
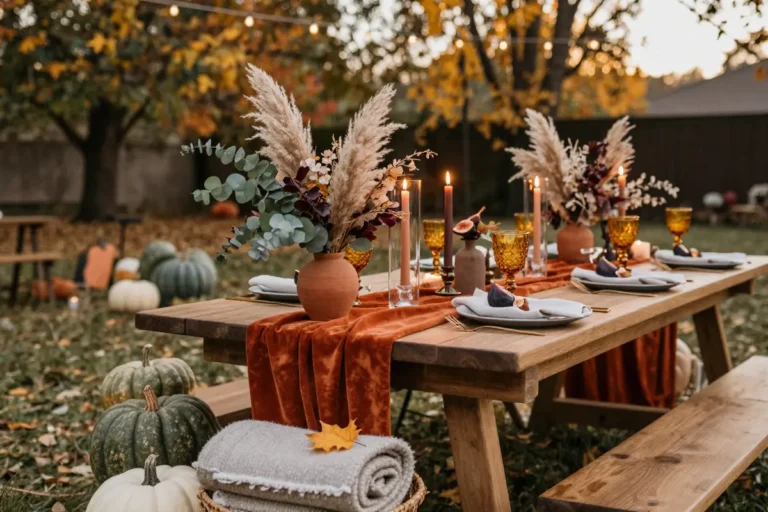
Mismatched Vintage Brass and Colored Glass Candlesticks

A cluster of tarnished brass candlesticks sits beside amber, olive, and dusty‑rose glass holders, each at a different height.
The varied silhouettes create a gentle wave across the banquet table, drawing eyes without overwhelming the decor.
Arrange the pieces in odd numbers, three or five per grouping, to keep the line balanced from end to end.
Choose drip‑less wax candles; they melt cleanly and eliminate the risk of wax stains on linen. If the venue bans open flames, swap the wax for battery‑operated LED tealights that mimic the same warm glow.
Before the day, wipe the brass with a soft cloth and a mild polish to prevent tarnish from darkening under candle heat.
Store the glass in padded boxes to avoid chips when reusing for future events.
For a budget‑friendly hunt, check local flea markets or estate sales for authentic vintage holders; a single piece typically ranges from $15 to $45.
Quick tip: line each odd‑numbered group with a thin silicone coaster; it catches any stray wax and protects the table surface.
Place a thin silicone coaster under each odd‑numbered group to catch any stray wax.
Hanging Silk and Velvet Ribbon Ceremony Canopies
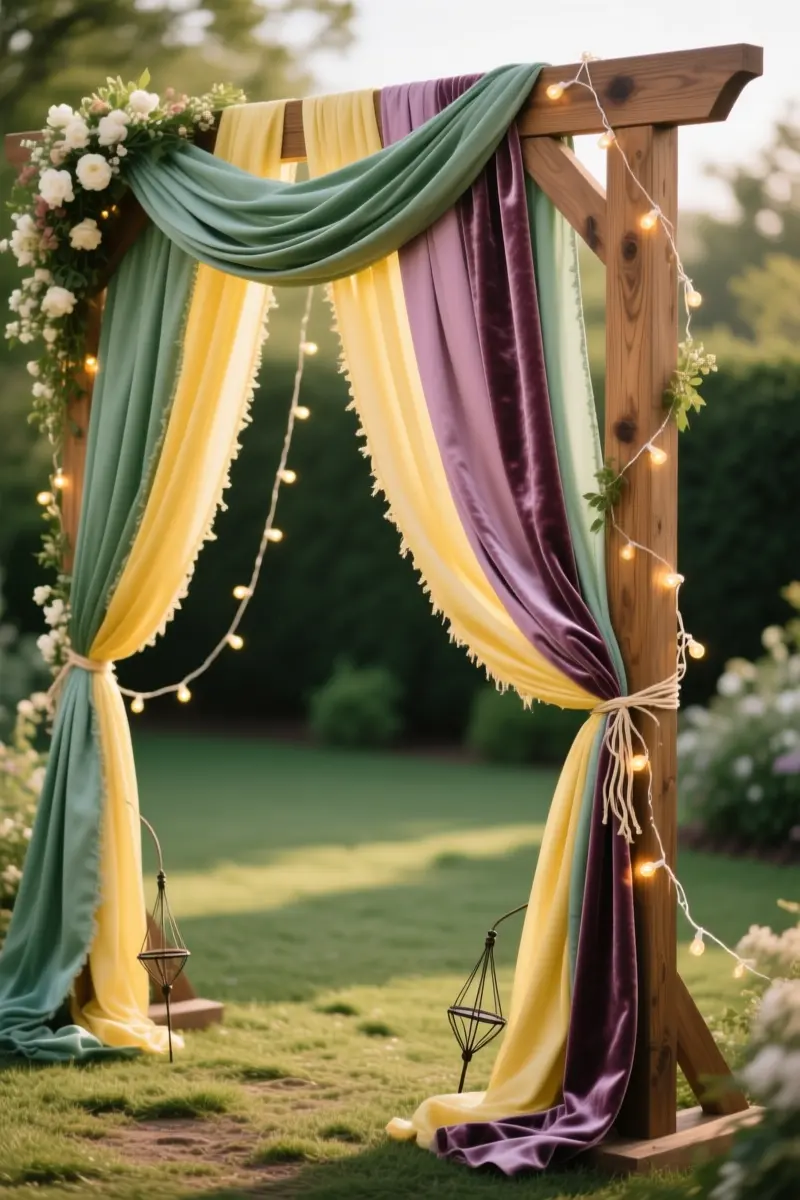
A wooden arch draped with raw‑edge silk and velvet ribbons forms a soft canopy over the ceremony space.
Choose ribbons in sage green, butter yellow, and mauve to keep the look elegant rather than circus‑like.
Cut each ribbon to 12‑foot lengths; the silk provides float, the velvet adds weight.
Tie the ribbons to the arch with floral wire, spacing them 8‑10 inches apart for even coverage.
Secure the loose ends with small fishing‑line weights or discreet garden stakes; this prevents a light breeze from turning the silk into a tangled mess.
If the venue is outdoors and wind is expected, consider swapping the silk for a heavier organza or opting for a pre‑made fabric drape that can be anchored to the floor.
A quick tip: attach a 2‑inch clothespin to each ribbon end before adding the weight; the pin makes later adjustments painless.
For a DIY budget, buy silk ribbon at $8‑$15 per yard and velvet at $12‑$20 per yard; a full canopy typically needs 30‑40 yards total.
Renting a ready‑made drape costs $200‑$350 and eliminates the need for cutting and weighting.
This ethereal backdrop works beautifully in indoor barns or garden tents where wind is minimal. Add a single strand of fairy lights behind the ribbons for a subtle glow after sunset.
Real Pressed Flower Acrylic Table Numbers
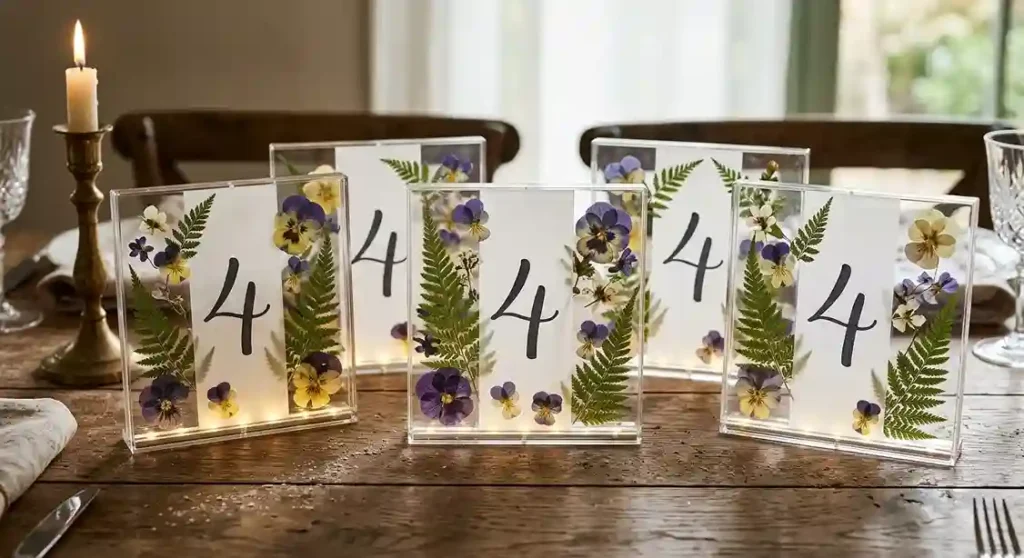
A clear acrylic frame filled with pressed ferns, pansies, and violas holds the hand‑painted number 4.
The botanicals add a soft, whimsical texture while the glass protects them from spills. Ink that lacks strong contrast can disappear under dim reception lighting, so choose a deep charcoal or midnight blue calligraphy ink and write on a thin white vellum strip behind each numeral.
DIY timeline: start pressing flowers 4 weeks before the wedding; allow 2 weeks for drying and another week to arrange them in the frames.
If the schedule is tight, order pre‑pressed ferns and violas from a florist, this cuts prep time to a single afternoon.
Steps:
- Cut acrylic frames to the desired size (8×8 in works well for most tables).
- Arrange the pressed botanicals in a loose, layered pattern, leaving a clear central spot for the number.
Secure the flowers with a dab of clear-drying craft glue.
Place the vellum strip, then hand‑paint the number using the contrasting ink.
Quick tip: apply a light coat of matte spray over the ink before sealing the frame; it prevents smudging and boosts readability.
Add a tiny battery‑operated LED strip along the base of each frame to keep the numbers legible after dark.
Moss-Draped Champagne Towers with Edible Florals

Nest the bottom tray of the champagne tower in a bed of damp Spanish moss and a scattering of small forest mushrooms.
The moss creates a soft, forest‑floor look while the mushrooms add texture that feels organic without looking childish.
Place the tower on a completely level, sturdy table; a wobble will topple the glasses and ruin the effect.
Lay a thin, waterproof parchment sheet under the moss to protect the table and to keep any excess moisture from soaking the glassware.
Float pesticide‑free edible violas in the top tier of coupes; the tiny blooms rest on the surface of the champagne and add a fresh, fragrant pop.
The whimsical charm comes with a trade‑off: the damp base demands careful placement and a quick wipe‑down before guests arrive to avoid soggy footprints on the table.
Quick tip: secure the moss edges with a light spray of clear acrylic sealant; it holds the material in place and reduces shedding during the reception.
Finally, keep a small bowl of dry ice nearby to chill the champagne without adding extra condensation to the moss.
Suspended Dried Baby’s Breath Clouds with Hidden Twinkle Lights

Weight and rigging costs quickly turn airy floral clouds into a budget nightmare.
A fully saturated 2‑metre cloud of dried baby’s breath can weigh over 50 kg, making water weight the single biggest risk factor.
Venues that forbid drilling require non‑invasive rigging such as freestanding frames or certified I‑beam clamps, and a static load test must be signed off by the venue manager.
Professional installation and rigging for a suspended cloud runs around £3,000, while individual stems range $3‑$12 each and a large bundle costs $10‑$20.
Weave delicate copper‑wire micro LED lights through the stems for a soft, hidden glow; the lights stay dim enough to highlight the airy texture without overpowering the ambience.
The downside is that dried stems shed fine floral dust onto dining tables throughout the night, so guests may notice a light haze on plates.
For a tighter budget, build a DIY frame from painted foam board, attach a lightweight bundle of dyed baby’s breath (about $15‑$25 per bunch), and run battery‑powered LED strips along the frame’s edges.
This reduces rigging load but still demands a secure attachment point and a load test.
Maintenance: brush the clouds gently after the reception and store them in airtight containers for reuse at a future event.
Quick tip: add a small sandbag to each rigging point to dampen sway and prevent the clouds from drifting.
Secure each copper wire with a zip tie before threading it through the stems to keep the lights from slipping during installation.
Draping Hand-Illustrated Paper Scroll Menus

A 12‑inch tall watercolor paper scroll draped over the edge of each dinner plate adds an unexpected touch of elegance.
The scroll features delicate botanical illustrations printed on one side, while a clean serif font lists the courses on the opposite side, keeping the design refined rather than whimsical.
Choose 300‑gsm watercolor paper so the scroll holds its shape without sagging.
For a budget‑friendly version, design a master template in a free design program, print it on standard cardstock, and hand‑tear the long edges for a natural texture.
This DIY approach costs under $1 per scroll, compared with $3‑$5 each for pre‑cut specialty scrolls from a paper boutique.
A common mistake is letting the scroll hang too loosely; it can snag on cutlery, wrinkle, or soak up sauce and wine as plates are passed.
Secure each scroll with a thin napkin ring or a discreet paperweight to keep it in place and protect the printed surface.
This simple addition preserves the look while preventing accidental stains.
Curved Velvet Lounge Corners in Unexpected Pastels
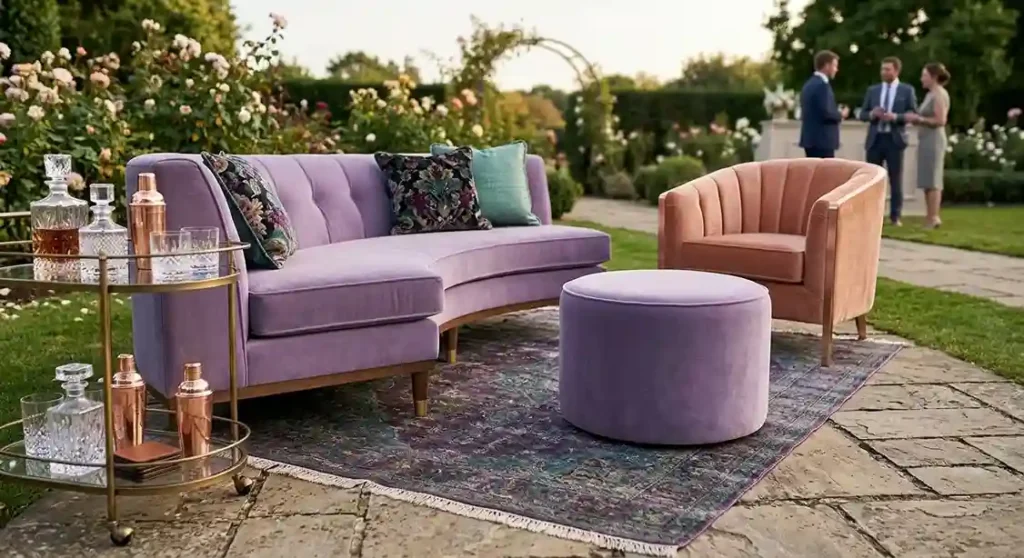
A pair of low, curved velvet sofas in lavender set the tone for a relaxed lounge.
Add a matching mint ottoman and a peach armchair to create a pastel crescent that feels intimate without looking childish.
Choose pieces with a solid wood frame and removable legs; the legs can be lifted for easier transport and storage.
For a garden ceremony, place the set on a compact, interlocking foam mat. The mat protects the velvet from grass stains and prevents the rental company from charging for moisture damage.
A sudden rain shower can soak the fabric, so keep a clear tarp nearby and pull it over the furniture at the first sign of clouds.
Measure the distance from the lounge edge to the bar. Leave at least three feet of clear path; this keeps guests moving smoothly between drinks and dancing.
Scale matters: a venue with 80 guests works well with a single curved section, while a larger hall can accommodate two mirrored crescents.
Quick tip: attach discreet, non‑slip pads to the sofa bases; they stop the furniture from sliding on wet grass and add a layer of protection.
Finish the area with a waterproof rug under the velvet to shield the pieces from dew and simplify cleanup.
Wildflower Seed Packet Seating Chart Displays
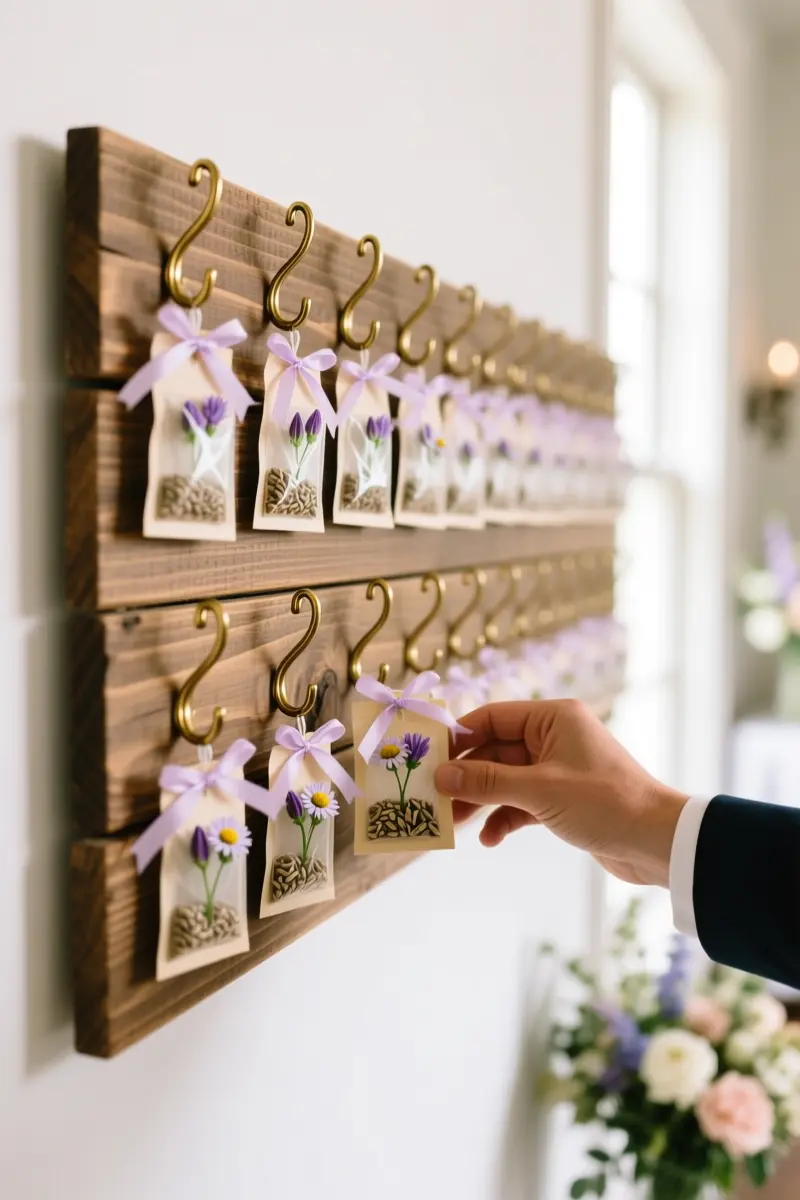
Guests often jam the printed seating chart, causing bottlenecks and missed conversations.
Swap the paper board for a wooden display board fitted with brass hooks, each holding a custom‑designed wildflower seed packet.
Arrange the packets alphabetically by guest last name instead of by table number; the linear flow keeps lines short and lets people find their name without crowding.
Choose regional flower seeds that bloom in your wedding month, such as lavender for June or coneflower for September, so guests can successfully plant them later.
To execute, print the guest list on a simple spreadsheet, then sort it alphabetically. Order bulk seed packets from a local nursery; they typically cost $0.60‑$1.20 each.
Cut small cardstock tags, print each name in a legible font, and attach the tags with a thin ribbon to the packet’s front.
Fill each packet with the seeds, seal with a clear sticker, and hang them on the hooks.
Quick tip: pre‑drill the brass hooks in a staggered pattern to avoid a straight line that looks too formal.
DIY‑friendly, this project can be completed in two evenings, but the labor of stuffing, labeling, and hanging hundreds of packets adds a tedious item to your final‑week checklist.
Add a small label with planting instructions on the back of each packet to guide guests after the wedding.
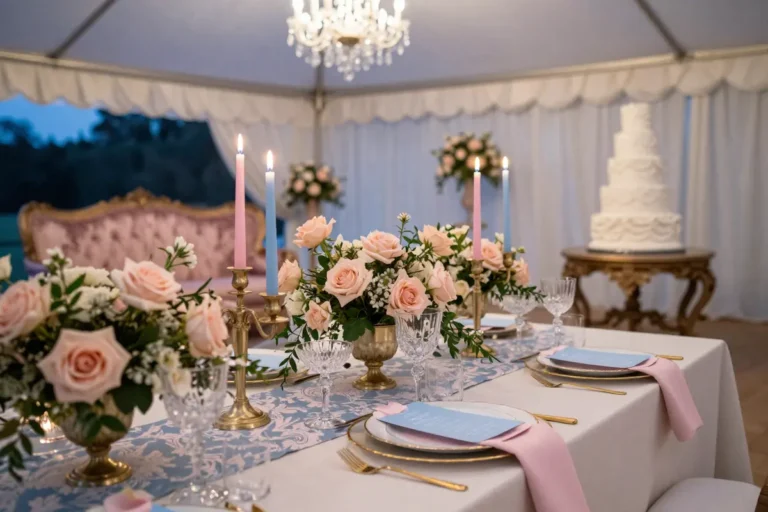
Mismatched Floral China and Colored Glass Goblets

Renting a curated vintage china set can run $150‑$300 per event, while hunting thrift‑shop pieces often costs under $50 but demands weeks of searching.
Start with a dominant hue, navy, sage, or blush, and select floral plates that share that shade in either the border or background.
Pair each plate with a colored glass goblet whose rim mirrors the chosen hue; a teal rim on a cobalt‑blue goblet ties back to a navy‑dotted pattern without clashing.
Lay plates in a staggered arrangement: a larger charger, then the floral dinner plate, then a small dessert saucer if you want depth.
Keep goblets uniform in shape but varied in texture, clear crystal, speckled amber, or frosted jade, to add visual interest while the color thread holds the look together.
Quick tip: place a single goblet at each setting and use a coordinating napkin ring to reinforce the dominant color, then fill the remaining goblets in a decorative sideboard for guests to admire.
Thrifting means you’ll need a climate‑controlled storage space and a dedicated weekend to hunt for matching pieces.
Rental services handle delivery, cleaning, and return, but they charge a premium and often limit the number of patterns you can mix.
For a budget‑friendly version, buy one vintage plate and one glass goblet, then duplicate the look with inexpensive porcelain replicas and tinted acrylic cups.
This DIY mix reduces cost while still delivering the whimsical, curated feel.
Store all pieces wrapped in acid‑free tissue and avoid dishwasher cycles to preserve glaze and glass integrity.
Add a navy napkin ring to each place setting to echo the dominant hue and complete the cohesive table.
Potted Sapling and Fern Aisle Markers

A cluster of 12‑inch terracotta pots, each wrapped in natural burlap and holding a young fir sapling topped with a fern frond, lines the aisle.
The living greenery replaces traditional cut bouquets and adds an earthy, forest‑like feel that matches a woodland wedding theme.
Because the plants stay rooted, they can be replanted after the ceremony, cutting floral waste and giving the couple a lasting reminder.
Transporting the pots from the ceremony space to the reception requires careful handling; the soil can be heavy and may spill if the planters are tipped.
Using sturdy pot caddies with wheels eases the move and keeps the burlap clean.
A quick tip: wrap the base of each pot in a thin layer of newspaper before loading to catch any stray dirt.
After the ceremony, keep the saplings in a shaded area and water them lightly to prevent stress.
For venues where heavy planters are impractical, consider lightweight wooden boxes filled with potted succulents; they still provide a living marker without the bulk.
Choose pot size to suit aisle width: 8‑10‑inch pots work well in narrow spaces, while 12‑14‑inch containers fill a broader aisle without overwhelming guests.
Place a small sandbag under each pot before transport to stop tipping and protect the root balls.
Illustrated Botanical Wedding Cakes Served on Vintage Dressers
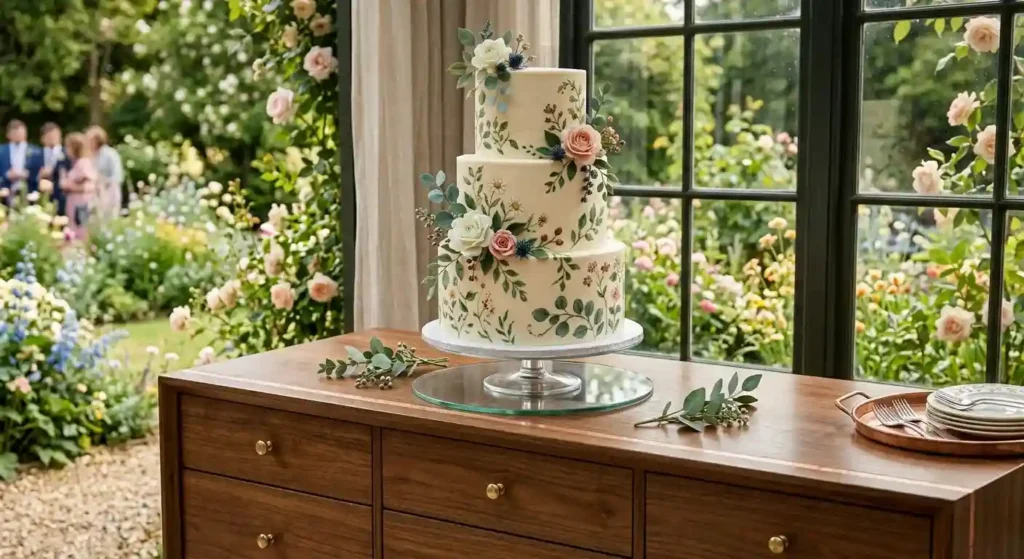
A mid‑century walnut dresser sits against the garden‑view wall, its polished top ready to showcase the cake.
Choose a three‑tier cake that stands 12‑14 inches tall; the dresser’s surface should be no more than 30 inches high to keep the tiers visible.
Measure the top’s width and leave at least eight inches of clearance on each side, so the cake doesn’t look swallowed.
Place a 10‑inch clear acrylic cake stand on the dresser; the stand lifts the tiers a few inches and creates a visual buffer.
Because vintage wood can harbor dust and isn’t food‑safe, cover the dresser with a 12‑inch food‑grade silicone mat or a clean glass platter.
Wipe the surface with a diluted bleach solution, let it dry, then apply a clear, food‑safe sealant spray. This protects the wood and prevents crumbs from slipping through the grain.
Quick tip: slip a slim metal riser, about two inches tall, under the acrylic stand to add height without altering the dresser’s silhouette.
A copper‑leaf strip along the dresser’s front edge frames the cake and signals guests where the dessert station begins.
Pick Your Favorite Whimsy
You’ve just explored everything from drip‑less vintage candlesticks to illustrated botanical cakes on antique dressers, each designed to add a layer of wonder without crossing into kitsch.
Pick one or combine a few that echo your color palette and venue, and you’ll have a cohesive story that feels both playful and polished.
Before you hand out invitations, sketch a quick layout of each element, note any venue restrictions, like open‑flame rules or weight limits, and source a backup plan.
Save this list to your wedding board, and tag a friend who’s hunting for fresh inspiration. When the day arrives, trust the details you’ve planned, breathe, and let the whimsical touches do the talking; you’ll see guests linger, smile, and share the magic.
Frequently Asked Questions
What makes a wedding whimsical?
A whimsical wedding is defined by its playful, organic, and non-traditional design details. It moves away from rigid formality by using elements like mismatched vintage tableware, botanical motifs, unexpected color combinations, and natural, free-flowing floral installations rather than tight, symmetrical arrangements.
What are some examples of whimsical wedding motifs?
Common motifs include pressed wild flora, watercolor botanical illustrations, celestial stars, vintage keys, moss-accented displays, and colored glass. These elements are often woven into stationery, signage, and tablescapes to create a cohesive, storytelling aesthetic.
How do you keep a whimsical wedding from looking childish?
To keep the aesthetic grown-up, anchor playful elements with high-quality, structured materials. Pair soft pastel colors with rich metals like antique brass, use heavy fabrics like linen and velvet, and maintain clean, modern typography on signage to balance the organic shapes.
Can you design a whimsical wedding on a budget?
Yes, whimsical styling is highly adaptable to a lower budget. Focus on high-impact DIY elements like collecting mismatched glass vases from thrift stores, using potted plants and greenery instead of expensive cut flowers, and opting for digital hand-drawn templates for your wedding day signage.